Communication Inbox
Explore Job Aids and Videos for more help:
Job Aids
Videos
The Communication Inbox is a centralized area within the Communications module where all emails received via the designated inbox email ID are displayed. It enables users to review communications and mark them as relevant or non-relevant. Additionally, users can organize and filter the view based on date, sender, or status.
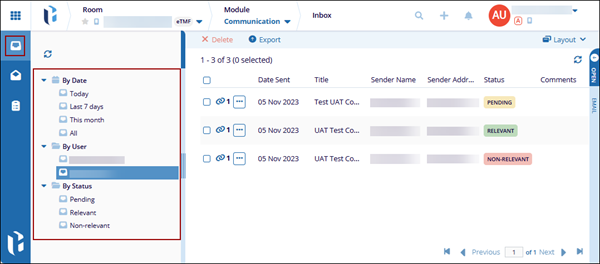
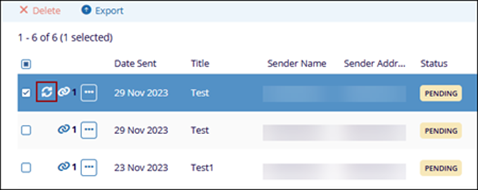
Communication Inbox Grid View
- Navigate to the Communications module and select the Inbox tab.
- Expand the folders from the left-hand navigation menu and select the options to filter
the grid.
- By Date: Allows users to view messages received during specific time periods such as Today, Last 7 Days, or This Month.
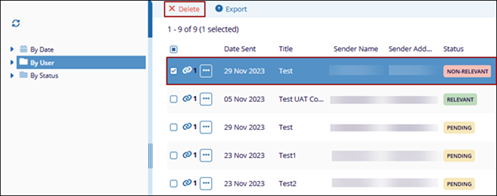
- By User: Displays messages grouped by the sender.
- By Status: Organizes messages based on their current status:
- Pending: Messages that have not yet been reviewed or classified.
- Relevant: Communications deemed important to the study.
- Non-Relevant: Messages identified as not significant to the study.
Add Status
-
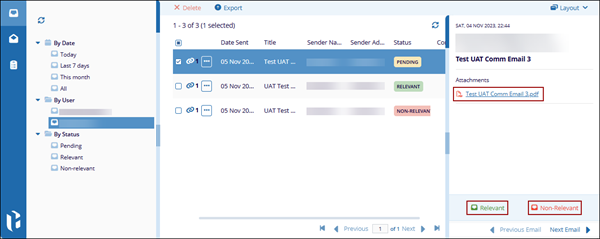
Select a communication with ‘Pending’ status from the grid and open the metadata panel.
-
Click on the attached PDF file from the metadata panel to review the content of the communication.
-
Click ‘Relevant’ or ‘Non-Relevant’.
-
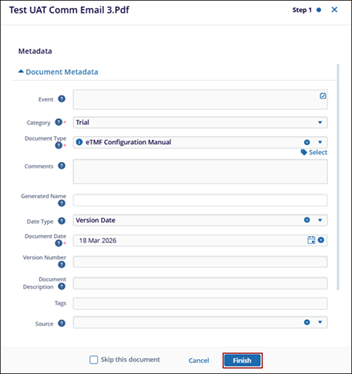
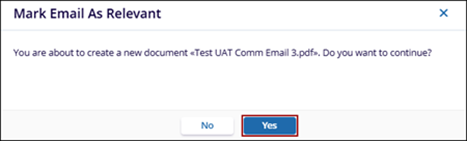
If ‘Relevant’ is clicked, the document profile window opens.
-
Fill in the required metadata fields and click Finish.
-
On the confirmation pop-up, click Yes.
-
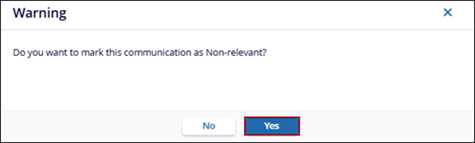
If ‘Non-Relevant’ is selected, a warning pop-up is displayed.
-
Click Yes to mark the communication as non-relevant.
-
Click the refresh icon to update the status.
 Note:
Note:Ensure that any images embedded in emails do not include hyperlinks. Images with inline hyperlinks can prevent successful PDF conversion; as a result, the Next button may remain greyed out even when all required metadata has been completed. If an embedded image contains a hyperlink, remove the hyperlink (or replace the image) before proceeding.
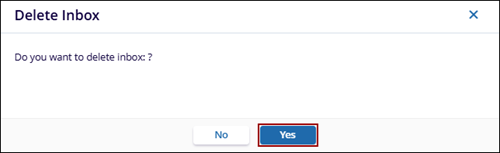
Delete Communication
- Select a communication with non-relevant status.
- Click Delete from the top menu bar.
- Click Yes on the confirmation pop-up.
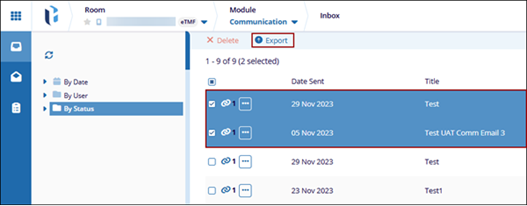
Export Communications
- Select the communication messages from the grid and click the Export button from the top
menu bar.
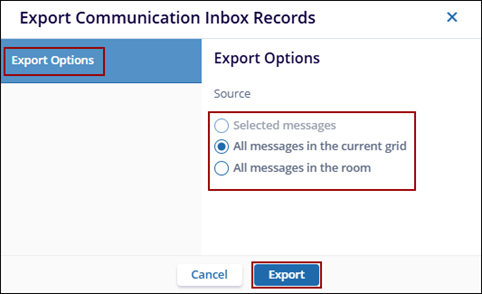
- On the ‘Export Communication Inbox Records’ window, select a source as export option as
below:
- Selected messages
- All messages in the current grid
- All messages in the room
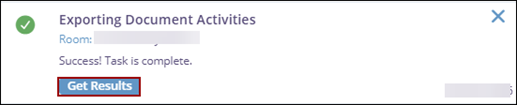
- Click Export.
- On the Exporting Document Activities pop-up, click Get Results.