Add Assignees
To assignees to the query, follow the steps below:
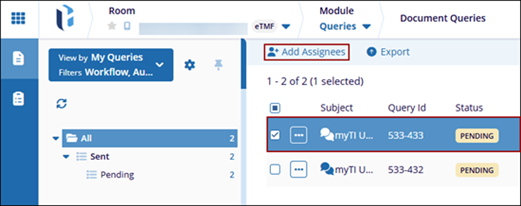
- Select a query from the Document Queries tab.
- Click the +Add Assignees button from the top menu.
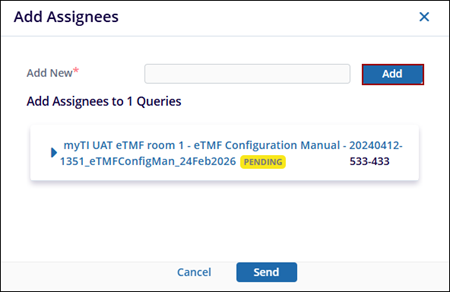
- On the Add Assignees window, click the Add button next to the Add New text
box.
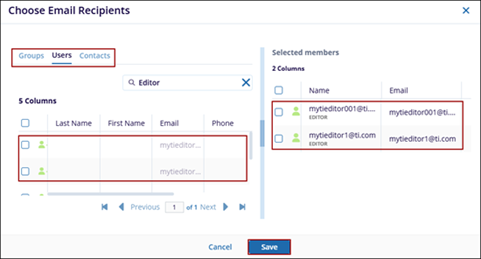
- On the Choose Email Recipients window, select the Groups, Users or Contacts tab.
- Select the required groups, users or contacts from their respective tabs and drag & drop them to the Selected member’s section.
- Click Save.
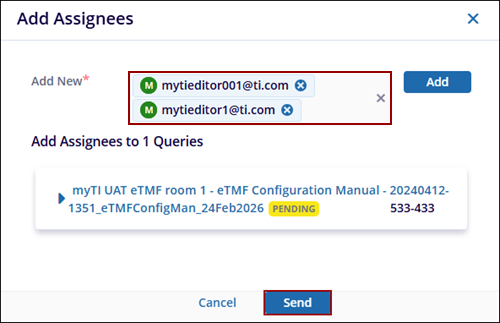
- Once selected, click the Send button to add the users as assignees.
- To reassign assignees, expand the queries metadata panel and click the +Add
Assignees button.
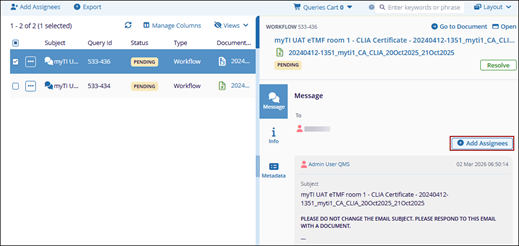
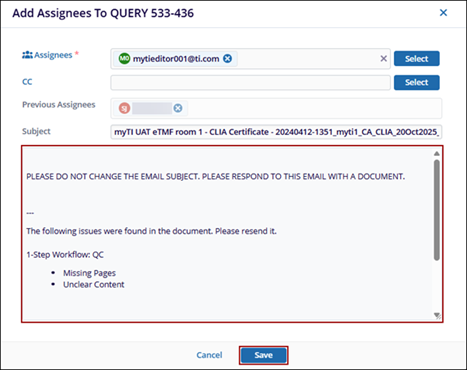
- Click Select on the Add Assignees window.

- On the Choose Email Recipients window, select the Groups, Users or Contacts tab.
- Select the required groups, users or contacts from their respective tabs and drag & drop them to the Selected member’s section.
- Click Save.

- Once the assignees are added, edit the email subject and body.
- Click Save.
 Note:
Note:- Query creators can reassign queries they have created, while assignees can only reassign queries assigned to them.
- Administrators can reassign any query.
- Email notifications are sent only to the newly assigned users.
- Previous assignees can still respond to the query but will not receive further notifications.
