Creating IRB/EC from Existing
Follow the below steps to add the existing agency:
- Click the drop-down arrow next to the Add button. The Create New and Create from Existing options are displayed.
- Click the Create from Existing option. The
Create Package pop-up window is displayed.

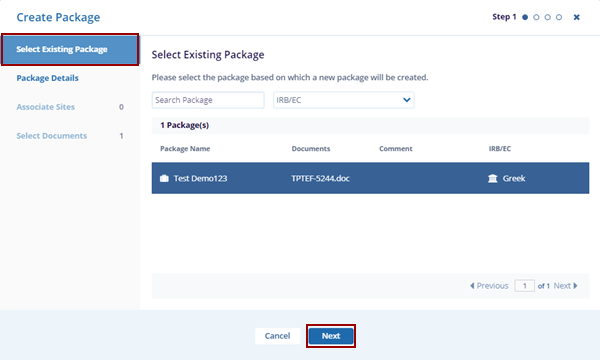
- In the Select Existing Package, the list of existing packages is displayed.
- Select the package based on which a new package will be created
and click Next.
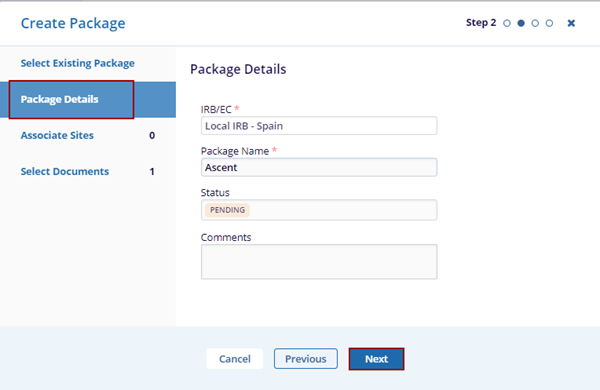
- In the Package Details tab, fill in the required fields – IRB/EC, and Package Name.
- Click the Next button at the bottom
of the popup window.
- This opens the Associate Sites tab, click on the + Associate Sites button.
- The Associate Sites pop-up window is
displayed.
This section will cover the following features:
- Status: Allows users to filter sites based on their selected status.
- Country: Enables users to specify a country as needed.
-
Show Selected Only: A toggle button that displays only sites filtered by Status and Country.
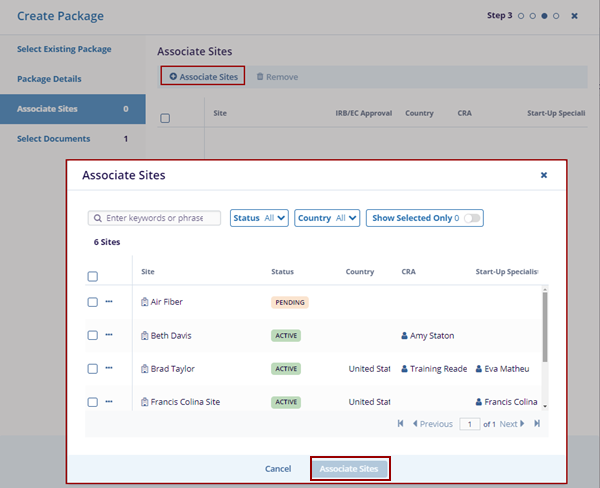
- Click Associate Sites, and the associated site is displayed within the Associate Sites tab.
- Click on the Next button.
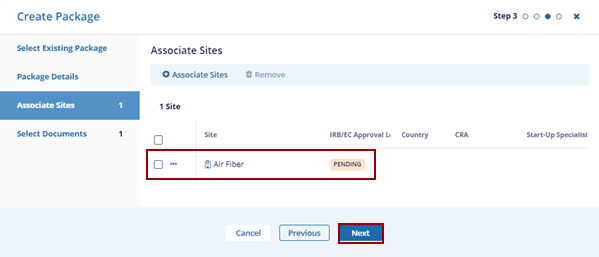
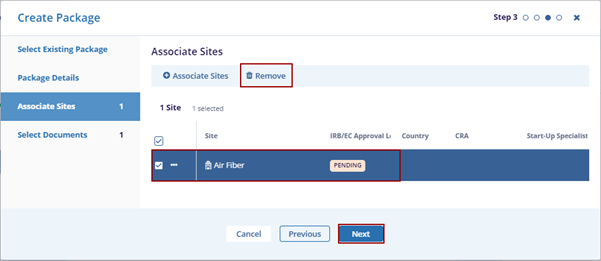
- Locate the Site and click the Remove button.
The associated site is removed from the Create Package.
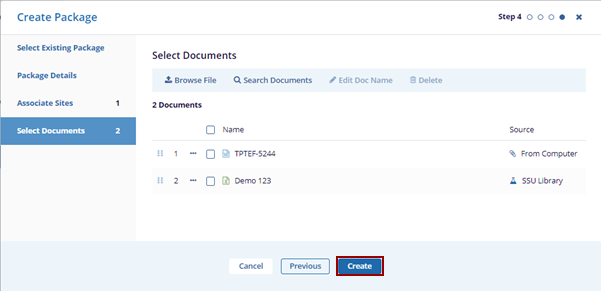
- This opens the Select Documents tab. As the
user is adding the existing package the Site is already associated
with the package.
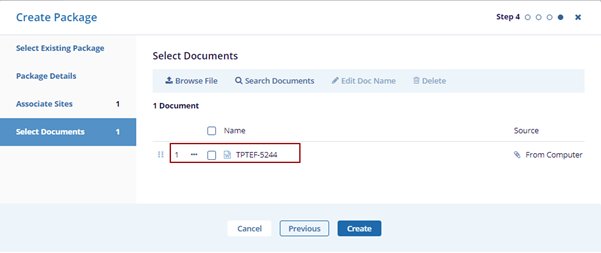
- If user want to associate another Site, then click the Browse Files on the top menu bar.
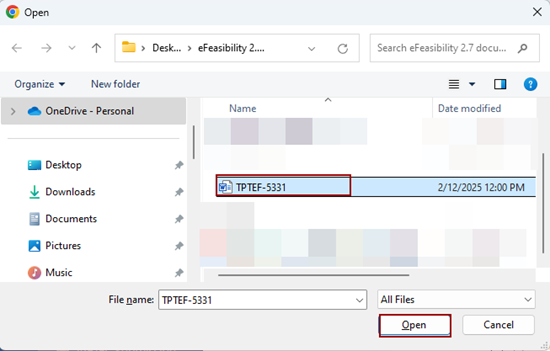
- Select a document from the system, and click on
Open.
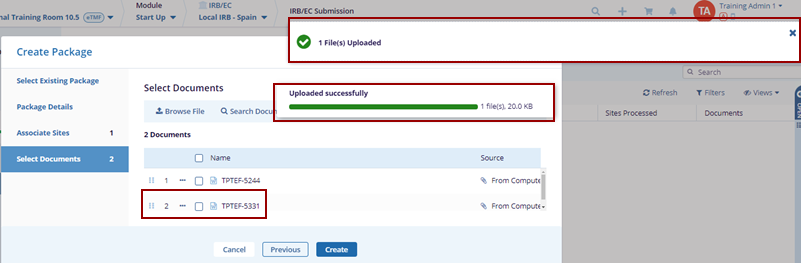
- The selected file is uploaded in the Select
Documents section and the notification message is
displayed on the screen.
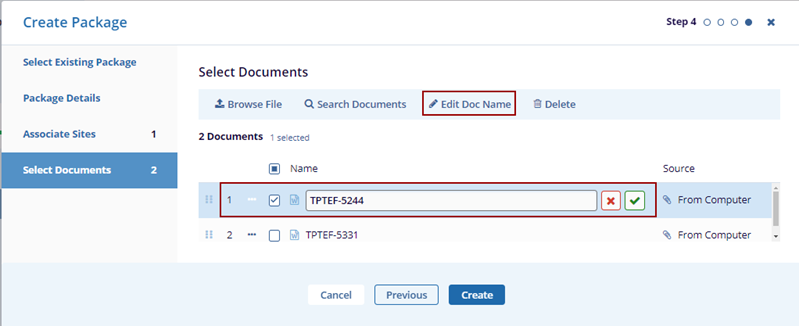
- Once the document is uploaded, select the document click on the
Edit Doc Name, make the required changes, and
click the Tick mark beside the document.
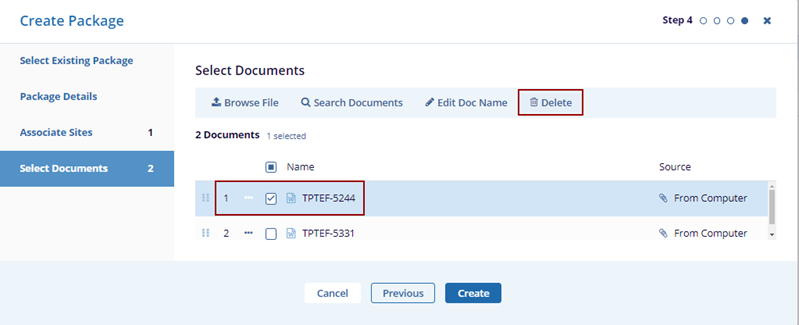
- Select the document and click Delete the
button to discard the action.
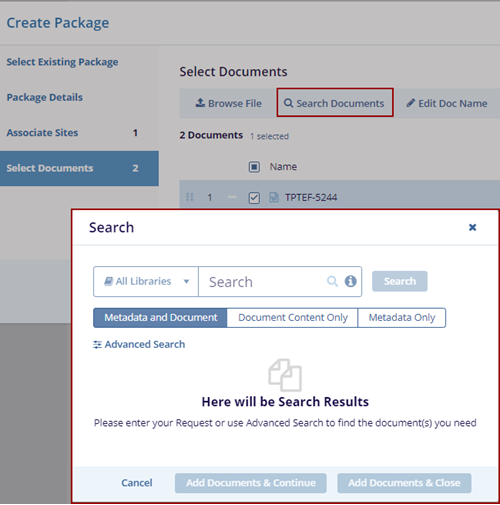
- Click the Search Documents tab the
Search pop-up window is displayed.
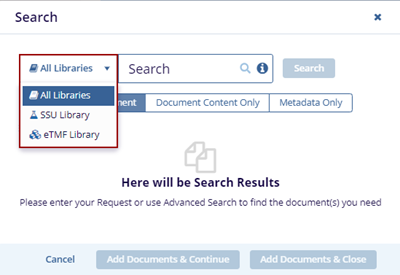
-
Expand the All-Libraries arrow to search from SSU Library or eTMF Library.
Note: Some hints to get better search results:
.png)
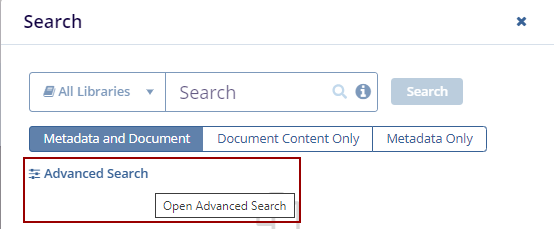
- Clicking the Advanced Search button in the
search pop-up window redirects the user to the Advanced
Search page.
- Users can add unlimited fields as needed with the + Add
More Fields button. The Advanced Search –
Add Fields pop-up window is displayed.
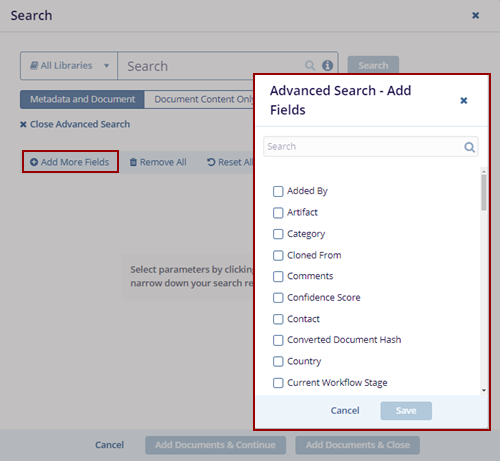
- Select the fields and click the Save button on
the Advanced Search – Add Fields.
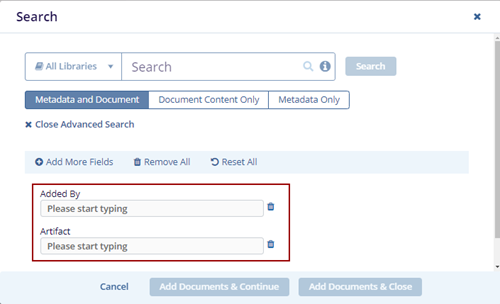
- Click the Remove All option to remove the added fields.
- Click Reset All resets the page with the
existing information.
.png)
- The Search pop-up window displays the below three tabs by
default.
- Metadata and Document
- Document Content Only
- Metadata Only
Note: The Metadata and Document tab is pre-selected by default. Choose Document Content Only or Metadata Only if you want to filter the results accordingly.
.png)
- Enter the document name in the Search field and click
Search. The searched document is displayed with
the Metadata on the left side.
.png)
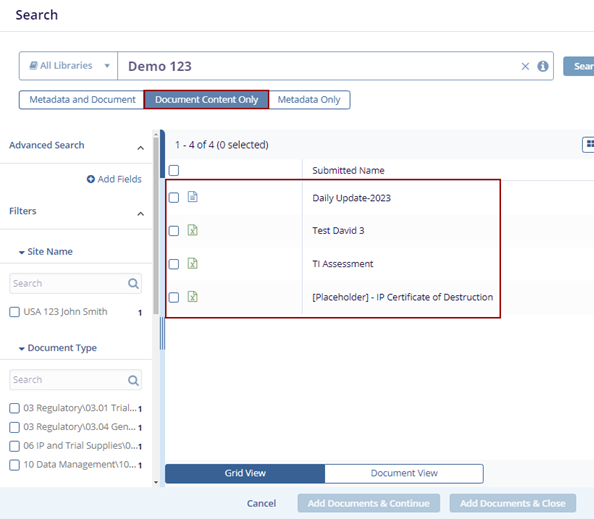
-
Click the Document Content Only tab it will display the document based on the content only.
-
Click the Metadata Only tab it will display the document having metadata.
.png)
- The users can view the views in two ways:
-
Grid View
.png)
-
Card View
.png)
-
- Click Add Documents & Continue will
display the notification message at the top right of the screen and
will continue on the same page to add the documents.
.png)
- Click Add Documents & Close will close the Search pop-up window.
- Click Create on the Create package pop-up
screen.
- The Package Created notification message is displayed at the top right of the screen.

TransPerfect’s Trial Interactive is an industry leader in practical, global eClinical innovation
PRODUCTS
 Linkedin
 X
X
Didn’t find what you need?
Our dedicated Project Management and Client Services team will be available to meet your needs
24 hours a day, 7 days a week.
Toll Free:
(888) 391-5111
help@trialinteractive.com
© 2025 Trial Interactive. All Rights Reserved
