Adding Sites
Follow the steps below to add the site:
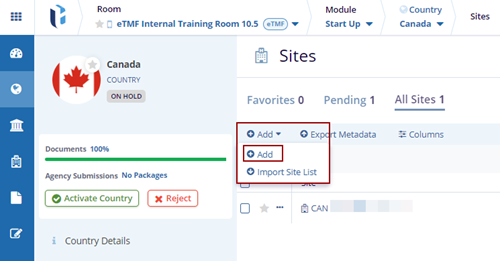
- Click the drop-down arrow beside the Add button.
- Click the Add button. The Create
Site pop-up window is displayed.
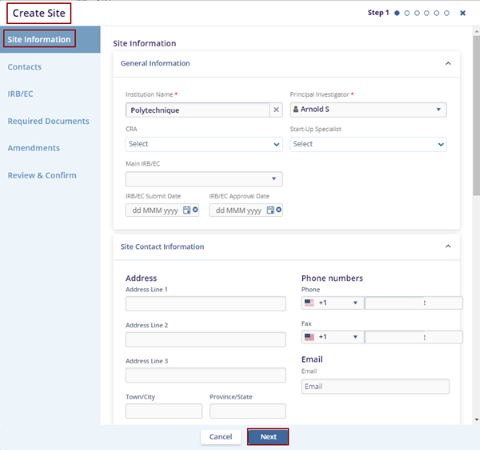
- Fill in all the required fields within the Site
Information tab and click the Next
button.
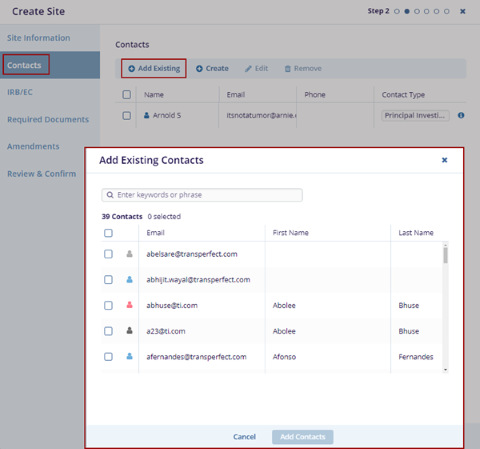
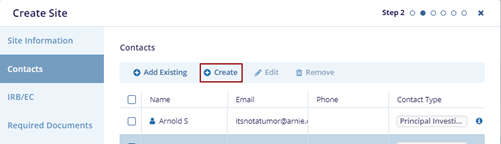
- The Contact’s tab is displayed on the Create Site pop-up window.
- Click the Add Existing button. The Add
Existing Contacts pop-up window is displayed with the list
of the contacts.
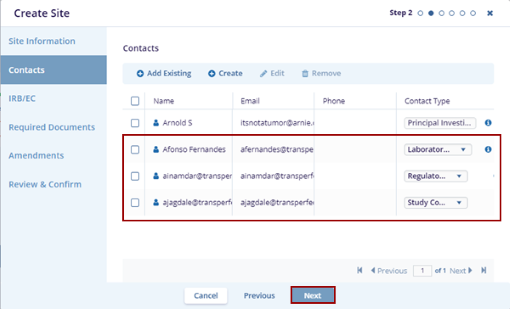
- Select the contacts and click Add Contacts button at the bottom of the Add Existing Contacts pop-up window.
- The selected contacts get added to the Contacts tab.
- Click the Create button on the Create Site
pop-up window.
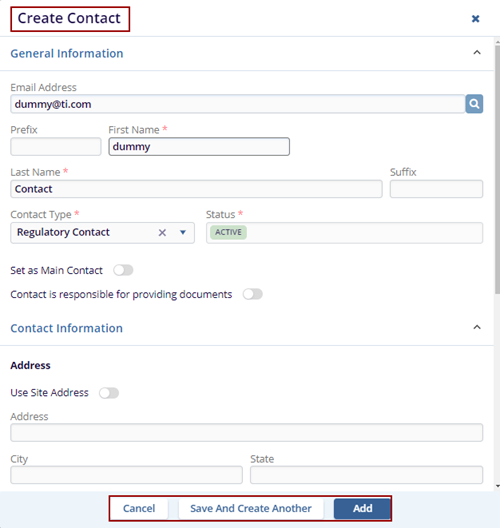
- The Create Contact pop-up window is displayed with the Cancel, Save And Create Another, and Add buttons.
- Fill in all required fields in the General Information, Contact Information, and Additional Information sections.
- Click Add to save the contact, or click Save and Create Another to save the current contact and add a new one, and Cancel to discard the changes.
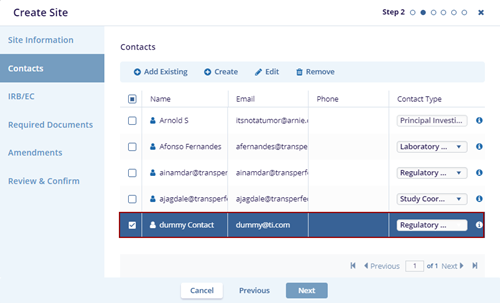
- The newly added contact will appear on the
Contacts page.
- Locate the contact and click the Edit button.

- The Edit Contact pop-up window is displayed. Edit the required fields and click the Save button.
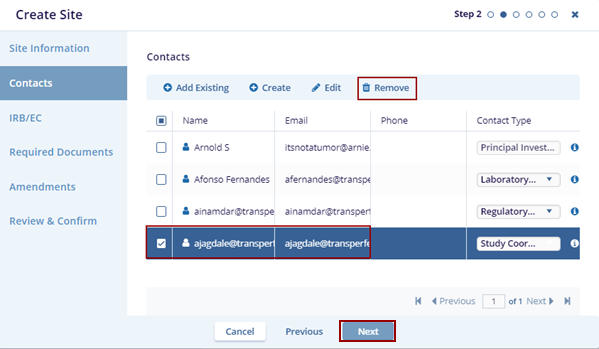
- Locate the contact and click the Remove
button. The selected contact disappears from the page and click the
Next button.
- The IRB/EC tab is displayed on the Create Site pop-up window.
- Click the Add Existing button. The Add
Existing IRB/EC pop-up window is displayed with the list
of the IRB/ECs.
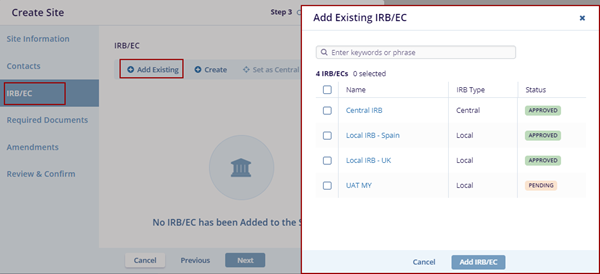
- Select the IRB/EC from the list and click the Add IRB/EC button at the bottom of the Add Existing IRB/EC pop-up window.
- The selected IRB/EC displays on the Create Site page.

- Click the Create button on the Create Site
pop-up window.
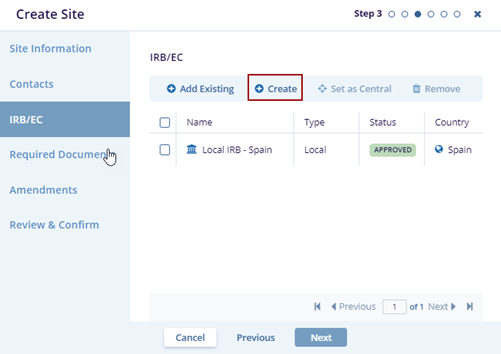
- The Create IRB/EC pop-up window is displayed with the Cancel, Save And Create Another, and Create IRB/EC buttons.
- Fill in all required fields in the General Information, IRB/EC Contact Information, Additional Information, Meeting Frequency, and Submission Deadline sections.
- Click Create IRB/EC if the user wants to create it, or click Save and Create Another to save the current IRB/EC and add a new one, and Cancel to discard the changes.
- Click Create IRB/EC the notification message
‘IRB/EC Created’ is displayed on the top right side of
the screen.

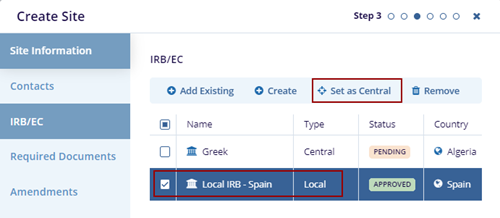
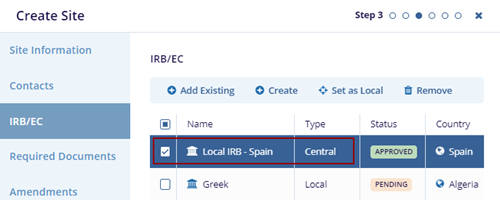
- Locate the IRB/EC with the type as Local and click the
Set as Central button. The type of the selected
IRB/EC changes to the Central.
- Locate the contact and click the Remove
button. The selected IRB/EC disappears from the page.
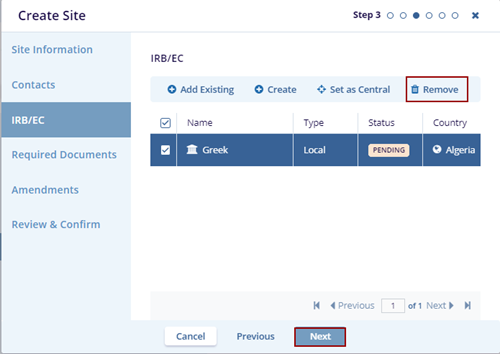
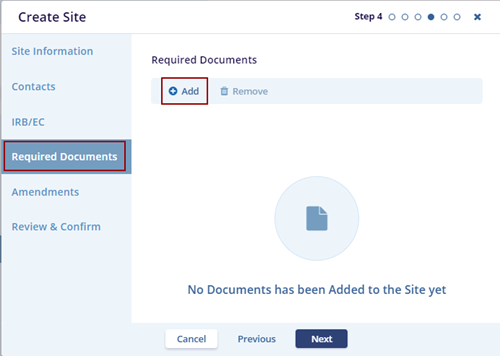
- Click the Next button. The Required Documents page is displayed on the Create Site pop-up window.
- Click the Add button. The Add Required
Document Types screen is displayed.
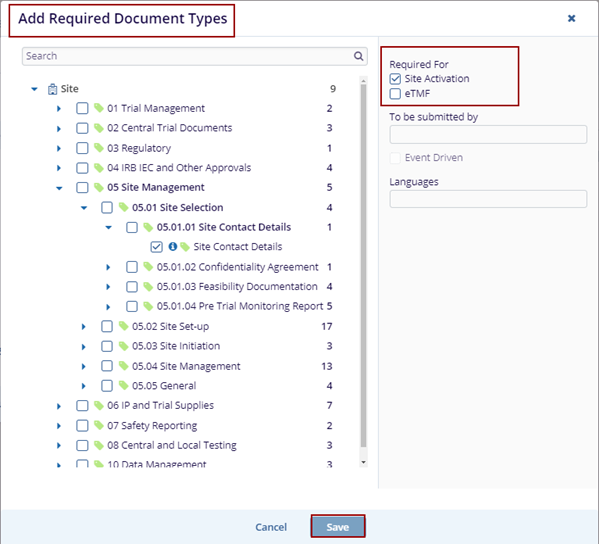
- Select the necessary document from the list determine whether
it is required for Site Activation or inclusion in
the eTMF and click the Save
button.
- The added document is displayed on the Create Site page.
- Locate the contact and click the Remove
button. The selected Document Type disappears from the page.
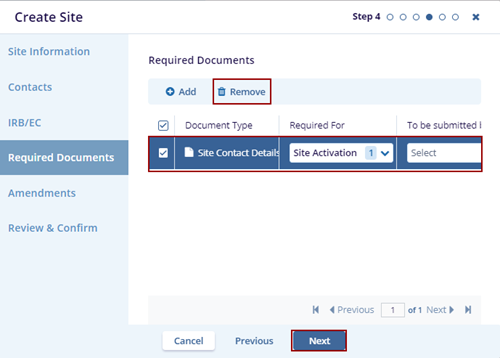
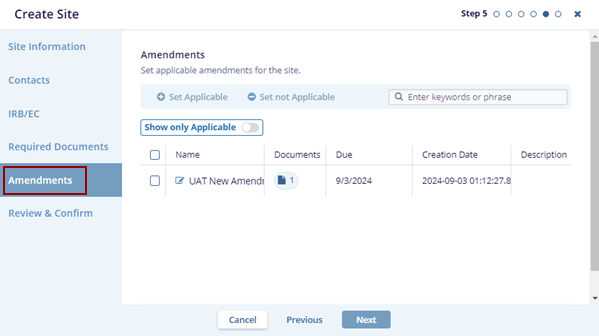
- Click the Next button. The
Amendments page is displayed on the Create Site
pop-up window.
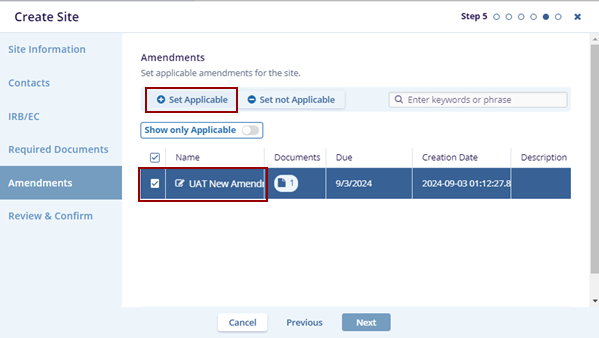
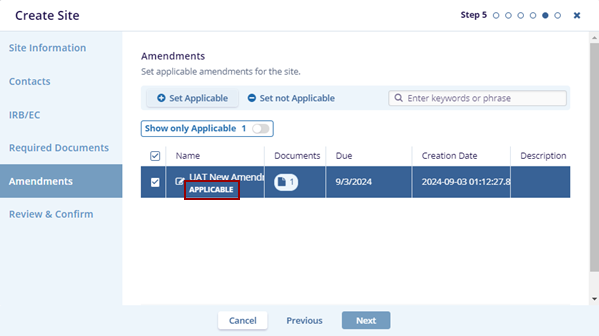
- Locate the Amendment and click Set Applicable,
the Applicable word is displayed right below the
selected Amendment.
- Locate the amendment and click Set not
Applicable, the selected amendment is set to not
applicable and the word Applicable disappears.
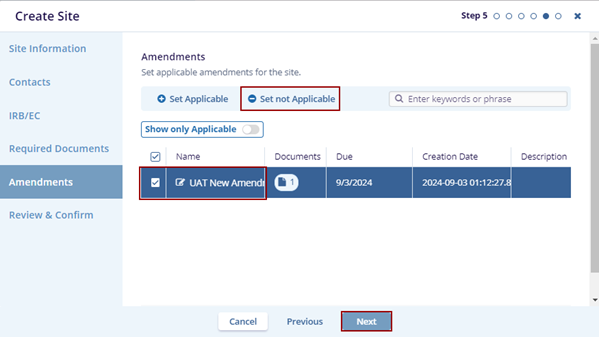
- Click the Next button. The Review & Confirm page is displayed on the Create Site pop-up window.
- Ensure by reviewing the information that is added while creating the site and clicking the Create button.
- The notification message ‘Site has been successfully created’ is displayed on the
top right side of the screen.

TransPerfect’s Trial Interactive is an industry leader in practical, global eClinical innovation
PRODUCTS
 Linkedin
 X
X
Didn’t find what you need?
Our dedicated Project Management and Client Services team will be available to meet your needs
24 hours a day, 7 days a week.
Toll Free:
(888) 391-5111
help@trialinteractive.com
© 2025 Trial Interactive. All Rights Reserved
