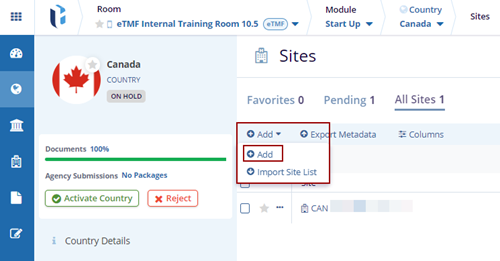
Adding Sites
Follow the steps below to add the site:
- Click the drop-down arrow beside the Add button.
- Click the Add button. The Create Site pop-up window is displayed.
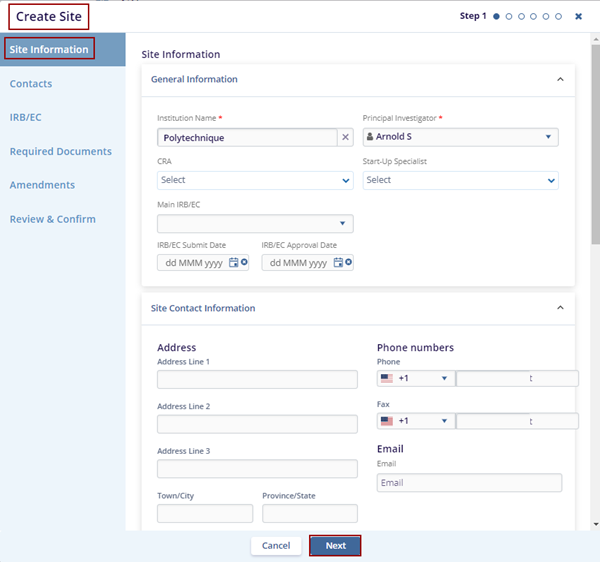
- Fill in all the required fields within the Site Information tab and click the
Next button.
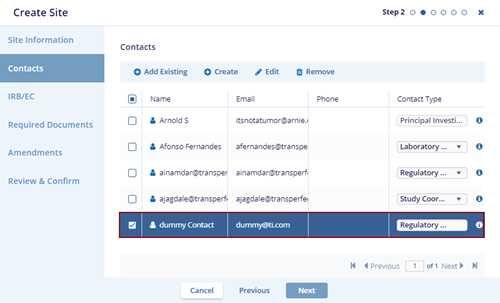
- The Contacts tab is displayed on the Create Site pop-up window.
- Click the Add Existing button. The Add Existing Contacts pop-up window is
displayed with the list of contacts.
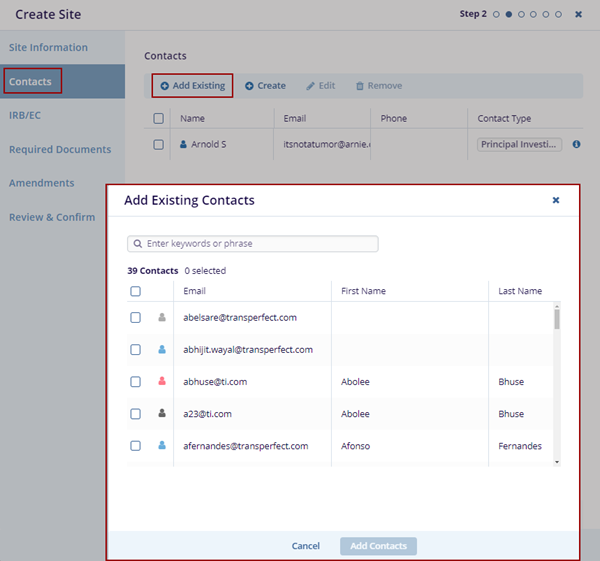
- Select the contacts and click Add Contacts button at the bottom of the Add Existing Contacts pop-up window.
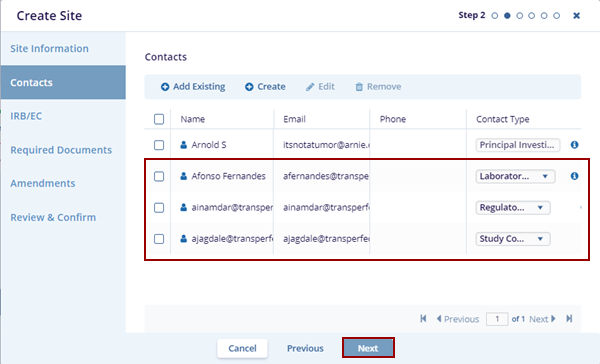
- The selected contacts get added to the Contacts tab.
- Click the Create button on the Create Site
pop-up window.
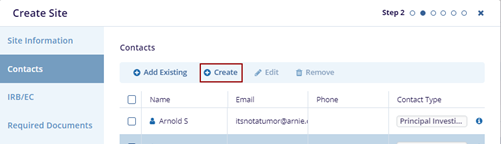
- The Create Contact pop-up window is displayed with the Cancel, Save and Create Another, and Add buttons.
- Fill in all required fields in the General Information, Contact Information, and Additional Information sections.
- Click Add to save the contact, or click Save and Create Another to save the current contact and add a new one, and Cancel to discard the changes.
- The newly added contact will appear on the Contacts page.

- Locate the contact and click the Edit button.
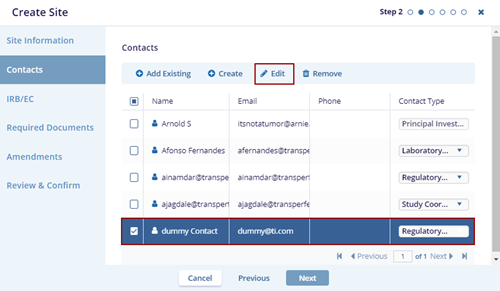
- The Edit Contact pop-up window is displayed. Edit the required fields and click the Save button.
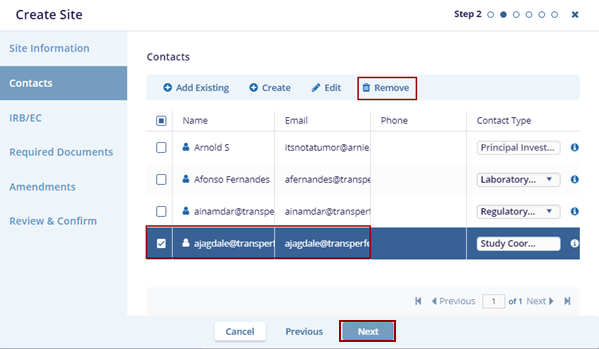
- Locate the contact and click the Remove
button. The selected contact disappears from the page, and you
click the Next button.
- The IRB/EC tab is displayed on the Create Site pop-up window.
- Click the Add Existing button. The Add Existing IRB/EC pop-up window is
displayed with the list of the IRB/ECs.
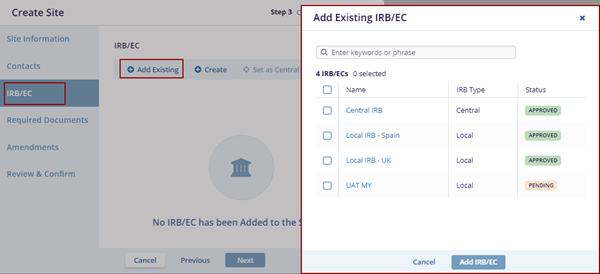
- Select the IRB/EC from the list and click the Add IRB/EC button at the bottom of the Add Existing IRB/EC pop-up window.
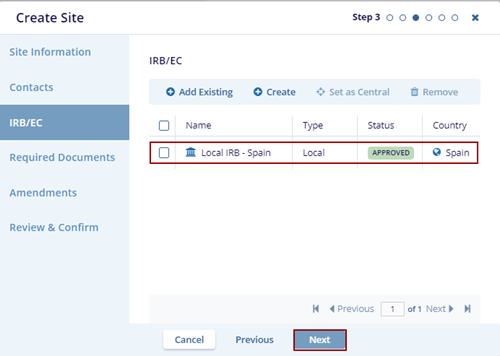
- The selected IRB/EC displays on the Create Site page.
- Click the Create button on the Create Site
pop-up window.
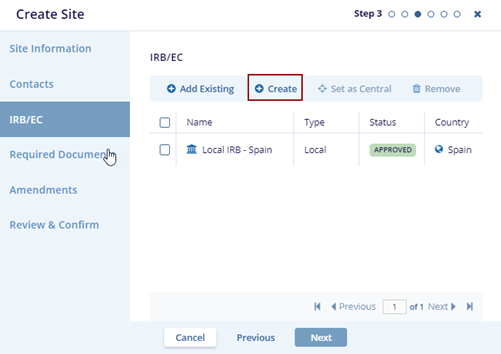
- The Create IRB/EC pop-up window is displayed with the Cancel, Save and Create Another, and Create IRB/EC buttons.
- Fill in all required fields in the General Information, IRB/EC Contact Information, Additional Information, Meeting Frequency, and Submission Deadline sections.
- Click Create IRB/EC if the user wants to create it, or click Save and Create Another to save the current IRB/EC and add a new one, and Cancel to discard the changes.
- Click Create IRB/EC, the notification message
‘IRB/EC Created’ is displayed on the top right side of
the screen.

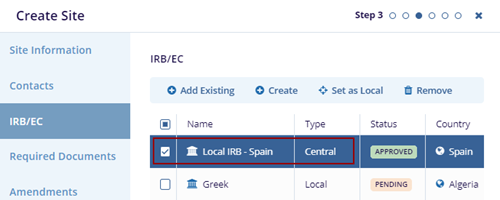
- Locate the IRB/EC with the type as Local and click the
Set as Central button. The type of the selected
IRB/EC changes to the Central.

- Locate the contact and click the Remove
button. The selected IRB/EC disappears from the page.
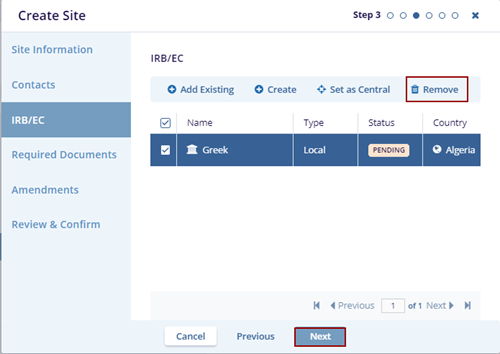
- Click the Next button. The Required Documents page is displayed on the Create Site pop-up window.
- Click the Add button. The Add Required Document Types screen is displayed.
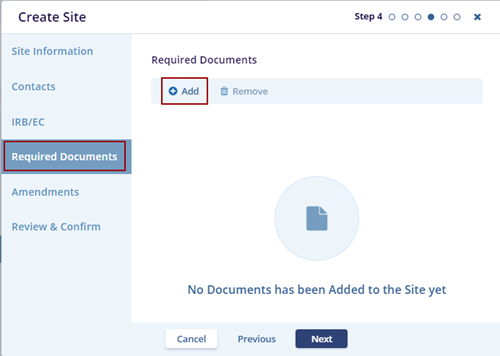
- Select the necessary document from the list, determine whether it is required for
Site Activation or inclusion in the eTMF, and click the Save button.

- The added document is displayed on the Create Site page.
- Locate the contact and click the Remove
button. The selected Document Type disappears from the page.
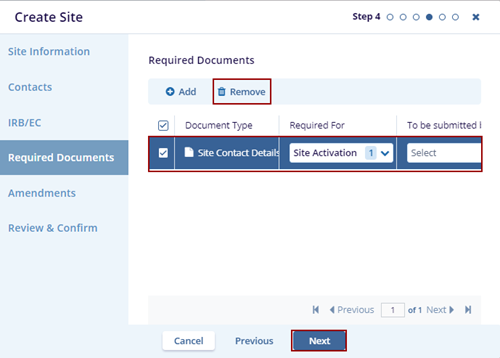
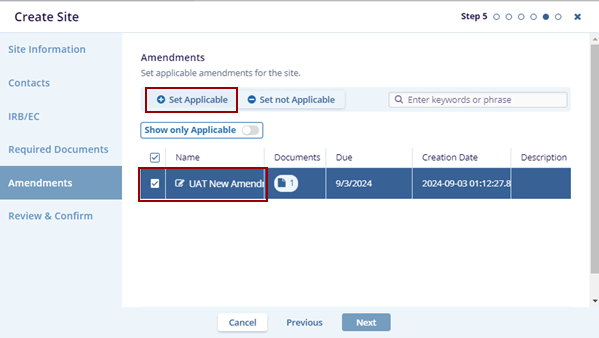
- Click the Next button. The Amendments page is displayed on the Create Site
pop-up window.
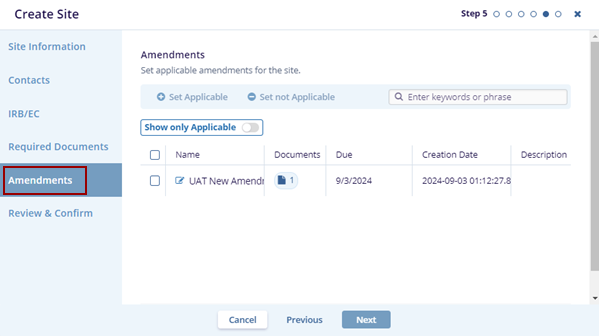
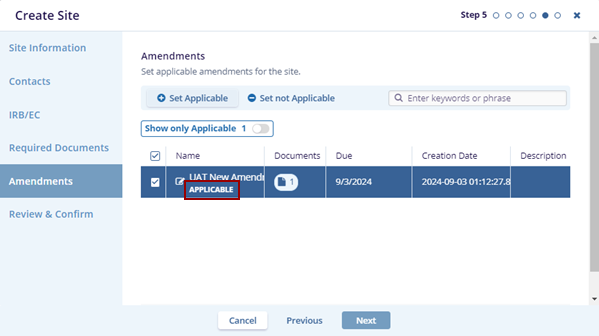
- Locate the Amendment and click Set Applicable. The Applicable word is
displayed right below the selected Amendment.
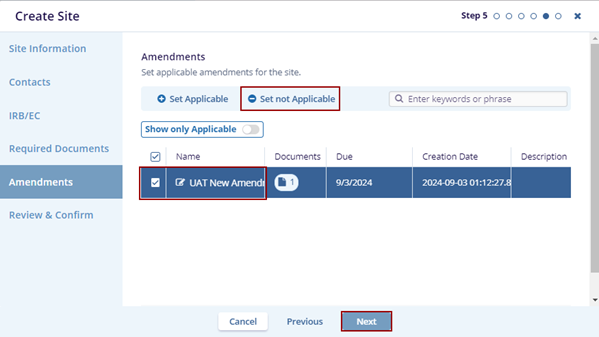
- Locate the amendment and click Set not
Applicable. The selected amendment is set to not
applicable, and the word Applicable disappears.
- Click the Next button. The Review & Confirm page is displayed on the Create Site pop-up window.
- Ensure by reviewing the information is added while creating the site and clicking the Create button.
- The notification message ‘Site has been successfully created’ is displayed on the
top right side of the screen.

© 2025 Trial Interactive. All Rights Reserved
